Hey guys, It's me Kimberly from the Prairie Sisters. I wanted to hop on and share with you a personal DIY, redo of my own. Because Kristy and I do a lot of our own furniture we thought it would be nice to share with you all our different styles, home interiors, DIY's, and other fun stuff straight from our homes as well as our Prairie Sisters goodies and upcycles.
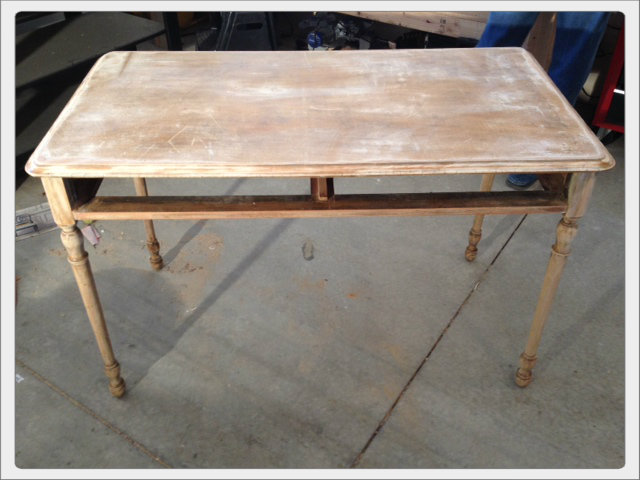
Over the weekend I was itching for a project to do. I have tons of furniture in my home that could use some pops of color. I had ideas for 2 different pieces already set in my mind but of course instead of starting those after already moving them out to be prepped I grabbed something I had no intentions of re-doing. My coffee table. I bought it from an Antique Store a few years back for 50 bucks. It's massive and real wood. The woman had told me it was so expensive because she bought it from an auction and it was Shabby Chic'd. I guess. You gotta watch these Antique stores, thrift stores and flea markets because they will indeed try to fool you at times into thinking you are buying something spectacular for such a high price. But that will be another post on how to spot the good, the bad, and the ugly of second hand shopping. Anyway she had it marked for 65 and we talked her down to 50. So I had myself a cute little white table that was Shabby Chic'd already. I guess? Anyway as the story continues I was laying in bed flipping through HGTV's April magazine Sunday night and happend on page 56 (just in case you need a refrence. ;)) It was featuring the living room of TV Lands sitcom Happily Divorced. O...M....G....I've never seen the show but the color palette was to drool over. I love the oranges, reds, greens, and woods with touches of white for a living room. The coffee table was adorable. I looked to my husband and said "I'm doing this to our coffee table, mmmmmmmmmm.... K?" and of course he was like "whatever you want Kimmy." So I fell asleep dreaming how easy this was going to be because my table was already white all I needed was to sand the top and stain it. Ummmmmmmm......Not quite.
Sneak Peak...
Here was my inspiration in case you aren't a magazine hoarder like myself.
Here's the table before
I thought sanding it would be simple and easy. Ummmm...No. There was layers of paint or someone really got happy with the laquer because I sanded, and sanded and nothing was lifting. After having trouble with the sanding I remembered one of my favorite blogs had a tutorial of stripping painted furniture....
http://www.lizmarieblog.com/2013/04/how-to-strip-painted-furniture/So using this as my source of "how to" I took myself to Home Depot and picked up the materials.
You will need...Stripping Gel, this one is odorless so works well if you are working in doors. Mineral Spirits for cleaning up the left overs, a wired brush, scrapper, and gloves. I do suggest forking out the extra money and buying a little more better quality gloves. These I picked up for a few bucks and before I was even done I had gone through all 6 pair because they would rip so easily. You do want to get a mask if you are working with a strong scented stripping liquid for safety reasons and crack open a window to get air ventilation.
After you have gotten all the materials together just spread the stripping gel all over the painted area you want to peel off. You should wait about an hour or longer if you want easier results but because I'm so impatient I started chipping away at the paint after about 15 minutes. I'm sure I made it much harder on myself for not waiting but I was eager. For those spots that just won't release themselves from the wood I put globs of the gel on top of them, let them soak in for a bit and then scrubbed them off with my bristle brush. It worked pretty well. After I used a rag and rubbed mineral spirits on top of the table to clean off all of the grime and left over gel and paint chips. FYI..It does get very messy so make sure you have some sort of sheet or a tarp down to collect the paint chippings and this is work so be ready for it and make sure you have time set aside.
The Process...It took me hours to do this. The paint was stubborn and I'm guessing if I would have waited longer for the gel to soak in it may or may not have been much easier? That's debatable though. ; )
Now that it was all done and prepped I got out the stain. I used MINWAX Water based wood stain and the selection of colors is AHHHHHMAZING. However, I went with the coffee tint.
I used a medium sized paint brush and lightly brushed 3 coats on top waiting a few hours between each coat. I then sanded it lightly, cleaned it off, and sprayed 3 coats of Polyacrylic to seal it waiting 30 minutes between each coat.
It came out a little darker than I had anticipated but after all the work I put into it I was NOT about to change it again. I decided it just looked "to pretty" if that is even a legal term for furniture. I like my furniture to feel traveled so I got some sandpaper and scruffed up the edges and top for a more used feel. This was before I cleaned off the dust from the sand but you can see a difference and the grain of the wood is peaking through a bit more.
Finally after all that work I got it cleaned and styled.....Phew........
And again my inspiration and my take on it....
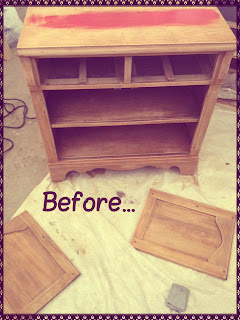
And....Stay tuned for this little number I will be working on next. If you follow me on Instagram or Facebook you may have seen me asking if I should paint it. Well guess what??? It's getting prepped and I'm ummmmmmm.....not looking forward to the stripping but the cute result is worth it.
O....M....G....I know, I'm in for it. Look at all the detailing. Oh boy....
Don't forget leave us a comment tell us what you think or if you have any questions on DIY's and other stuff feel free to ask in the comment section. Until Next time.....
Shared this post on...
http://www.notjustahousewife.net/2013/04/show-me-what-ya-got-114.html
http://www.lizmarieblog.com/2013/04/inspire-me-please-linky-party-6/
http://www.rainonatinroof.com/2013/04/give-me-goods-link-party-6.html


